


Showing posts with label craigslist. Show all posts

Monday, July 26, 2010

A Few Things To Come...

I haven't had a lot of time to blog recently but I have been working on a few different projects.  A few of them for about a month now!  So I thought I just might do a quick posting covering some of my current projects.

The first project is also the oldest.  I saw an add on craigslist awhile back listing a bunch of frames for $25.00.  This is the picture that was posted in the craigslist ad:


I saw a couple that I liked and so I figured it was worth to just buy the whole lot.  When I showed up at the lady's house, she had 4 Trader Joe's bags stuffed full of frames...there must have been 25 frames.  So I picked out my favorites and started spray painting them.


And then I laid them out on my floor to figure out the composition I wanted for the wall...


Now all I have left is to put some artwork in them!  Hence the delay...

The next project I have been working on (or at least have done some work on) is a refinishing project for two antique side tables. 


I picked these up at the thrift store for $15.00 a piece and so far have only sanded and primed one of them.  I think this is going to be the first project in which I paint them and them immediately "rough" them up...I am a little scared...but wish me luck!


 Don't they have such cute detailing???


And the last project for this post is a little antique sewing box I picked up at the consignment store around the block from where I work.  I am thinking about it as a place to keep my dogs food...but it might also become home to all of the remotes that float around my house.


It has a really cute little ledge inside probably for knitting needles...but I thought it might be the perfect place to store a piece of chalk.  Then I could put a little chalkboard paint on the doors so I can label what is inside...because who out there doesn't love to label things???


So the first night I got it I happen to be babysitting Miss Skye...so of course I put her to work sanding it for me!  I mean she has to earn her keep somehow right???


I hope you have enjoyed my little rendition of "things to come...."


Thursday, July 22, 2010

My Kitchen...Now New And Improved!!!

So if you have seen my blog before, you have probably seen the some of updates that have been made to my kitchen.  But in case this is your first perusal...here is the wall above my stove.


Isn't that hole lovely??? When I moved in there was a 4 inch metal tube going from my oven to my wall.  Its purpose appeared to be for venting...but it wasn't actually hooked up to anything so it was just there for "decoration" I guess...so I riped it down first thing.  And now I get to stare at this while I am cooking...appealing right?

It also left a hole at the top of my stove which I have not cleverly hidden with a cupcake shaped trivet.


So I knew I needed some artwork for my kitchen so I landed on adding a large chalkboard (for more on that click here) and some prints.  I saw this post on Stephanie's blog Under The Table And Dreaming.  I really loved the vintagey feeling of these signs and loved the "if you can't take the heat" message!  Too cute!


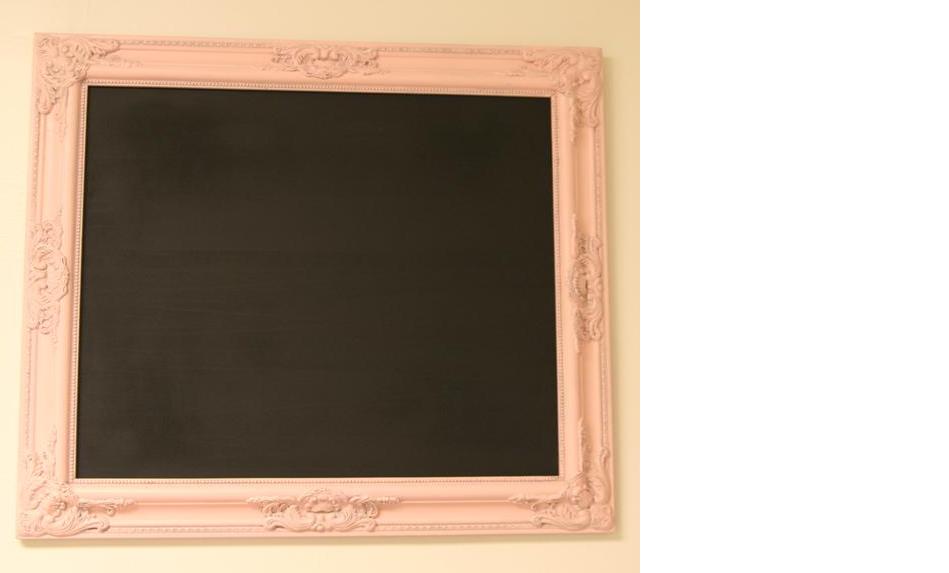
So I printed two of them out that I thought would look cute with the chalkboard.  And since the chalkboard was in a very ornate traditional styling, I thought I should choose frames for the other two prints that had that same feeling.  Here is a quick before-and-after of the chalkboard redo:


I picked up this frame awhile back at Marshall's for $8 bucks.  I originally picked it up for my Dad (sorry Dad) to use to frame one of his many family western pictures, but the shape is just too cute and so I kept it.


It got a couple of quick coats of ballet slipper pink spray paint and it already looked distressed. 


Which inspired my to attempt glazing on the other two frames (more of that story click here)


And since I like this frame the best, I choose to put the print in it I like the best.  But what should I back it with to make it pop?


I really like the Japanese papers from Paper-Source so I thought I would start there.  and this classic cherry blossom print was very pretty...but I felt it was just a little too busy and not really the vibe I was going for.  so I tried out this one...


Again cute...but just not right.  The saying is "tough" so I needed a paper pattern to match it.


Now this was closer to what I was going for...but still not just right.  I felt it was too busy...so maybe a solid would look better...


Now I liked this the best!  But it just looks too flat...too one dimensional.  So maybe if I blew the print up larger?


OK I like this, but still too plain (I am a very picky woman...haha)


Then I remembered I had some leftover paper from some invitations I had done that had a great print.  So I grabbed the extras from my craft room...


I like that...but the print kind of gets lost because it it so light...


And this was good.  But it was still lacking something...so maybe a combination of solids with a print...


And tada!  Perfection!  Now for the next frame.  I started using this cheapo frame that was part of a grab bag of frames I got from Craigslist for $25.00 awhile back, but it just didn't fit with the other two...


See what I mean?  The top one is too plain.  so I remembered that I recently acquired a few other frames from the thrift store (again purchased for my Dad and once again I kept them...sorry Dad).  And these have a much better shape to them.


So a couple coats of spray paint later...


So here is the final product hung up in my kitchen!


Pretty cute huh???  It is a big improvement!  This is much better to walk in to...


And the two framed prints look pretty good together...


So here is the final before and after shots...enjoy!


Friday, July 16, 2010

So One More Post About Artwork For My Very Bare Walls!

While perusing Blogger-land last week I came across this inspirational picture on a post (forgive me…I don’t remember whose blog it was).


And I loved it! Not only for its very sweet message, but also because I need artwork for my walls and it matches the color of my living room. And I just happen to have this bare wall that is crying out for something to be hung on it (not unlike the rest of my walls!)


I also had a frame from the $25.00 craigslist frames that isn’t a standard size – it appears to be 8x11 ½. So I printed this off on the color laser printer I have at my desk at work, and brought it home. The size looked a little off, so I trimmed the edges of the print and backed it with some Italian Bertini paper I had lying around from Paper-Source. This made it look much better.


I know it is strange (or just plain lazy) to back my paper directly onto the backing of the frame, but in this case it worked out just fine.


Now for the frame itself, I didn’t want to leave it the awful Gold color that it was, so I decided to spray paint it using two different finishes. Both are from the Rust-Oleum line of Universals, and I went with the Metallic Silver and Brown Hammered cans.


The way I achieved the effect I was going for was to spray two coats of the silver spray paint directly onto the frame (no primer) and with only about 30 second in between the coats. It’s ok if the coats are a little thick and it is ok if the spray paint runs a little. As soon as I was done applying the silver, I immediately applied two coats of the Hammered spray paint on the still wet silver paint. This mixes the paint colors together, and since the hammered paint settles on the frame in a weird way anyways, once again drips don’t matter. I then gave the frame a good 4-5 minutes to dry a little before I applied one more thick coat of the brown hammered paint and then let it dry overnight. This gives it that sort of marbled looking finish.


I really like this finish and I did it on a couple of the frames for another project I will be completing soon (the rest of the $25.00 frame lot from craigslist). I realize that it is not for everybody, but I like that it is slightly different from the simple “flat” finish that you usually get with spray painting something.


I even really like it on this dresser/sideboard in my living room (the picture is very deceiving as the colors appear to clash here, but in person they match and complement each other beautifully), but my bare walls need it more than the sideboard does. What do you think?


And I am sorry for the poor quality of some of the photos. My 3G iPhone just doesn’t take very good pictures…so I guess it is time to upgrade to the iPhone 4. It seems like it just might be a necessity!!!


Once again, it was really great to go from this:


To This!!!


linking with: