



First things first, I am actually fostering a puppy for the next 10 days while her current foster Mom goes to Burning Man for the next 10 days! I actually really want to keep her, so hopefully this will all go well! Here name is Queen Sophie Ann (Sophie for short) and she is a 5 1/2 month old Chihuahua mix.
.jpg)
Isn't she cute? Her foster Mom works with a local rescue organization, A Leg Up Rescue. Doesn't she look like a little fox?
.jpg)
.jpg)
.jpg)
I meet her this weekend at a local dog beach in Albany, where I take my pups to go play in the water and sand. Here is a pic of Bowser chasing the current as it rolls back, and then running away in fear when it returns...haha...and he got some sea water in his mouth and he started to foam at the mouth, it looked like he was rabid!
.jpg)
chasing the water showing it who's boss...
.jpg)
and then running away in fear...
.jpg)
Isn't this picture cute? He is actually smiling!
Ok, moving on...
So this is one of the projects that is started and not finished. I bought this huge utensil sorter (?) from Ikea that I think will work great as a craft sorter.
.jpg)
.jpg)
.jpg)
It is the from the Rationell line...
.jpg)
So I took off all of the attachments on the back so that I could spray paint it and eventually Mod-Podge some decorative paper in each little section. I am still playing with the idea of not putting all of the dividers back it when I am done...we'll see I guess...
.jpg)
.jpg)
.jpg)
Another project I am working on is refinishing these two cute sidetables I found at a local thriftstore. I was thinking of using a gray primer and painting them a creamy white, but distressing them enough to see the gray peeking through.

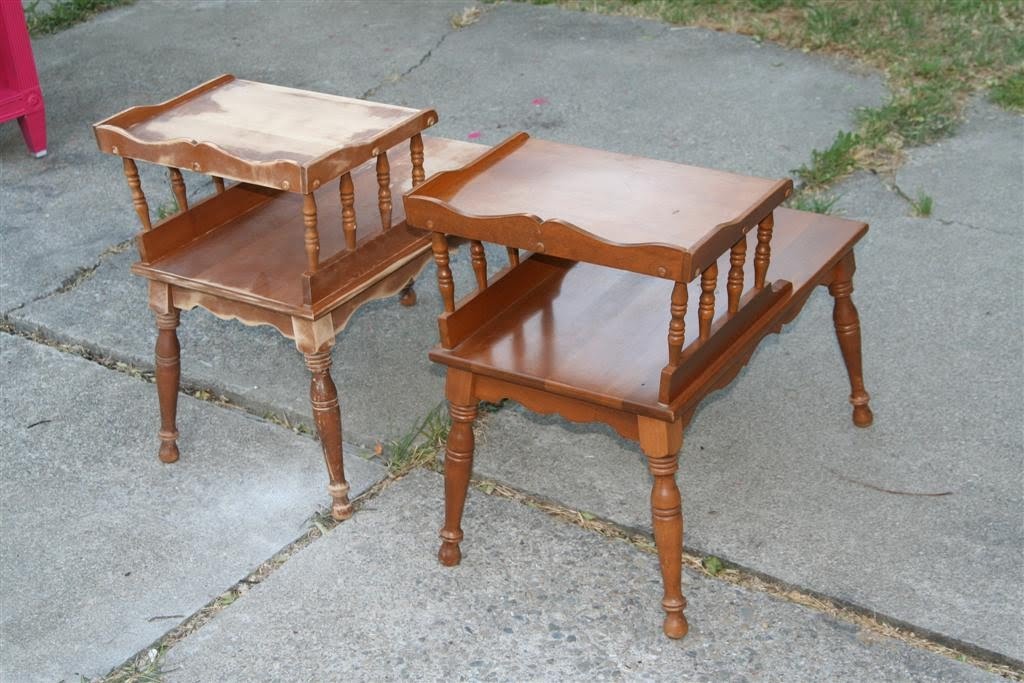

sadly they have been in this state for quite awhile now...
next I have a lamp that I have finished for a client but I didn't take after pics on (I know...dumb). But she is a friend of mine so next time I am at her house I will take some "after" shots.
.jpg)
.jpg)
The lamp actually has some really pretty lines...it was just looking a little "southwest" and outdated with its beige plaster and brass hardware. So I painted the base a high-gloss teal and used high heat metallic silver spray paint on the hardware...it looks much better now!
.jpg)
And besides these projects I just have a bunch of smaller "little" projects.

This is a Craigslist find that will hopefully find a new home after it gets a makeover...

This is the hutch to a desk I am actually refinishing for my kitchen...
.jpg)
This silver plate is getting some new paint and a stencil to soon house my keys on my console table...
.jpg)
These candlesticks are getting some spray paint and a new life along with this cup...
.jpg)
And last but not least I am painting these frames black to hold some much needed artwork in my bedroom.
.jpg)
Hopefully I can get my butt in gear and stop abandoning projects half way through to take on a new one...I need to finish these projects up! As in addition to what I have posted here, I have some client projects awaiting a transformation, three dressers that need paint and hardware and another nightstand! I am going to be a busy little bee over the next month....whew!


.jpg)
.jpg)
.jpg)
.jpg)
.jpg)
.jpg)
.jpg)
.jpg)
.jpg)
.jpg)
.jpg)
.jpg)
.jpg)
.jpg)
.jpg)
.jpg)
.jpg)
.jpg)
.jpg)
.jpg)
.jpg)
.jpg)
.jpg)
.jpg)
.jpg)
.jpg)