Showing posts with label pink. Show all posts

Thursday, July 22, 2010

My Kitchen...Now New And Improved!!!

So if you have seen my blog before, you have probably seen the some of updates that have been made to my kitchen.  But in case this is your first perusal...here is the wall above my stove.


Isn't that hole lovely??? When I moved in there was a 4 inch metal tube going from my oven to my wall.  Its purpose appeared to be for venting...but it wasn't actually hooked up to anything so it was just there for "decoration" I guess...so I riped it down first thing.  And now I get to stare at this while I am cooking...appealing right?

It also left a hole at the top of my stove which I have not cleverly hidden with a cupcake shaped trivet.


So I knew I needed some artwork for my kitchen so I landed on adding a large chalkboard (for more on that click here) and some prints.  I saw this post on Stephanie's blog Under The Table And Dreaming.  I really loved the vintagey feeling of these signs and loved the "if you can't take the heat" message!  Too cute!


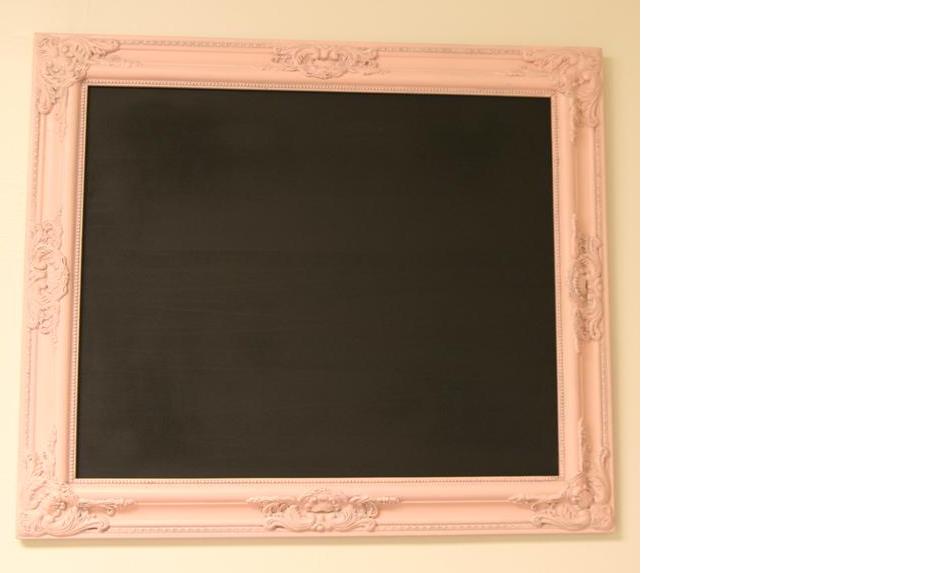
So I printed two of them out that I thought would look cute with the chalkboard.  And since the chalkboard was in a very ornate traditional styling, I thought I should choose frames for the other two prints that had that same feeling.  Here is a quick before-and-after of the chalkboard redo:


I picked up this frame awhile back at Marshall's for $8 bucks.  I originally picked it up for my Dad (sorry Dad) to use to frame one of his many family western pictures, but the shape is just too cute and so I kept it.


It got a couple of quick coats of ballet slipper pink spray paint and it already looked distressed. 


Which inspired my to attempt glazing on the other two frames (more of that story click here)


And since I like this frame the best, I choose to put the print in it I like the best.  But what should I back it with to make it pop?


I really like the Japanese papers from Paper-Source so I thought I would start there.  and this classic cherry blossom print was very pretty...but I felt it was just a little too busy and not really the vibe I was going for.  so I tried out this one...


Again cute...but just not right.  The saying is "tough" so I needed a paper pattern to match it.


Now this was closer to what I was going for...but still not just right.  I felt it was too busy...so maybe a solid would look better...


Now I liked this the best!  But it just looks too flat...too one dimensional.  So maybe if I blew the print up larger?


OK I like this, but still too plain (I am a very picky woman...haha)


Then I remembered I had some leftover paper from some invitations I had done that had a great print.  So I grabbed the extras from my craft room...


I like that...but the print kind of gets lost because it it so light...


And this was good.  But it was still lacking something...so maybe a combination of solids with a print...


And tada!  Perfection!  Now for the next frame.  I started using this cheapo frame that was part of a grab bag of frames I got from Craigslist for $25.00 awhile back, but it just didn't fit with the other two...


See what I mean?  The top one is too plain.  so I remembered that I recently acquired a few other frames from the thrift store (again purchased for my Dad and once again I kept them...sorry Dad).  And these have a much better shape to them.


So a couple coats of spray paint later...


So here is the final product hung up in my kitchen!


Pretty cute huh???  It is a big improvement!  This is much better to walk in to...


And the two framed prints look pretty good together...


So here is the final before and after shots...enjoy!


My First Attempt at a Chalkboard

*WARNING* Once again I have managed to include to many pictures in my post!

So I have known for awhile now that I needed a large piece of artwork for my kitchen (there is a large hole in the wall from the old stove venting hose). 


And I have really been inspired by chalkboards lately...and really, aren't chalkboards a great alternative to art in the kitchen?  so I have been on the hunt for a large frame with some classically inspired embellishments.  So while shopping at a local consignment shop at lunch one day a couple of weeks ago I spotted this little lady...

(Miss Bunny B in the corner)

Her coloring was pretty hideous, but she was heavy and substantial, had great lines, and the artwork was hideous enough that I wasn't going to feel bad about spray painting over it and then just ripping it out.


so I headed to my local Ace Hardware store and picked up some supplies...


A piece of scrap 1/2" plywood that they had in stock cut down to the correct size (I brought my frame in with me and the guy who cut it took it in the back with him so he could get the right measurements), some magnetic spray paint (which ended up being a money pit), some chalkboard paint, foam sponges, spray primer and pink spray paint.


Because I was using spray primer I didn't sand the frame at all; however, I did sand the plywood with a 320 grit sanding block before I spray primered it.


After the first coat of primer...

(Miss Bunny B again...she just LOVES to refinish things!)


So I then moved on to spray painting just the frame in Ballet Slipper pink.  (The house I rent was built in the 1920's and has a very cute vintagey feel.  So I have tried to keep in line with the feel of kitchen and spice it up with very retro feeling colors and artwork.)


The color came out beautifully but it had that I-just-spray-painted look and feel.  So I tried my luck with my first attempt at glazing (more on that here).  It came out pretty good in my opinion.  so I took to pulling the artwork out and installing my chalkboard painted piece of plywood.


All I had on hand were round staples for my staple gun...so I just went with it!  And once I was done, I tried nailing in a finishing nail at an angle to finish things off.  Now the first one worked out great...but the second one...went right through the plywood and not into the frame.  Oops!  Guess I didn't go in with enough of an angle...


So I just moved on and took it in stride!  I decided to no longer use the finishing nails and felt confident that my chalkboard was secure in its frame with the staples.  So I just touched up the blemish with some chalkboard paint (a pretty thick coat to fill it in, since the rest of the plywood got a three coat finish).


And it ended up being just fine...


You can barely notice it.  Now for my little rant about the spray paint magnetic surface.  I didn't want to spend $28.99 for the 1 quart can of the magnetic paint, so I opted for the $8.99 bottle of spray paint.  Now the coverage on the can says 2-3 square feet.  Now my piece of plywood is a little larger then that at just over 4 sq. ft. so I only sprayed around the outside edges and left the middle un-magnetized.  I figured this was fine since I would be the only person sticking magnets up there and i would know the limitations.  HOWEVER, after it dried, not even my super dooper strong magnets would stay on...the just slid right down.  So back to Ace I go and pick up another can, and go over the same surface area again.  After this can is exhausted I realized that the super dooper magnets would stick, but no regular magnets (AKA cute ones).  So back I go for a third can.  Now I have invested $27 in magnetic spray paint and should have gotten 6-9 sq. ft. of coverage out of the cans.  But after the chalkboard paint was added (which is fine according to the magnetic spray paint can), still only the super strong magnets will stick...and just barely.  Maybe, maybe they will hold a single sheet of paper up.  Long story short, don't waste your money on this!

Moving on...now my chalkboard is finished!  Although in the end it ended up coating me much more then I thought it would...$96.00 in total!  But I guess I will learn from my magnetic mistakes.


All in all my kitchen looks much better with the chalkboard.  And tonight will be 3 days since the last coat of chalkboard paint was applied...so I can condition it and use it for the first time!


 and here is the before and after for all of you voyeurs out there!!!


and to: