So if you have seen my blog before, you have probably seen the some of updates that have been made to my kitchen. But in case this is your first perusal...here is the wall above my stove.
Isn't that hole lovely??? When I moved in there was a 4 inch metal tube going from my oven to my wall. Its purpose appeared to be for venting...but it wasn't actually hooked up to anything so it was just there for "decoration" I guess...so I riped it down first thing. And now I get to stare at this while I am cooking...appealing right?
It also left a hole at the top of my stove which I have not cleverly hidden with a cupcake shaped trivet.
So I knew I needed some artwork for my kitchen so I landed on adding a large chalkboard (for more on that click
here) and some prints. I saw
this post on Stephanie's blog
Under The Table And Dreaming. I really loved the vintagey feeling of these signs and loved the "if you can't take the heat" message! Too cute!
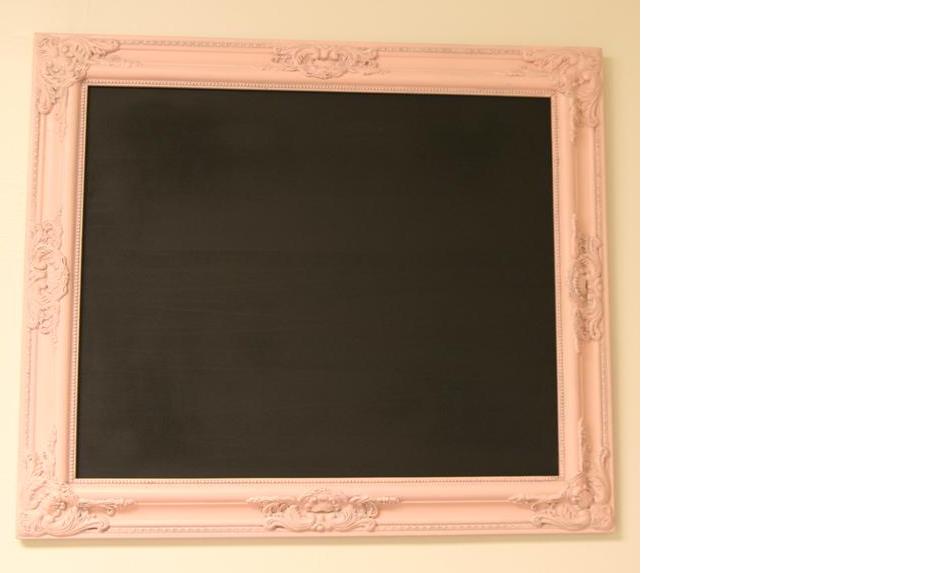
So I printed two of them out that I thought would look cute with the chalkboard. And since the chalkboard was in a very ornate traditional styling, I thought I should choose frames for the other two prints that had that same feeling. Here is a quick before-and-after of the chalkboard redo:
I picked up this frame awhile back at Marshall's for $8 bucks. I originally picked it up for my Dad (sorry Dad) to use to frame one of his many family western pictures, but the shape is just too cute and so I kept it.
It got a couple of quick coats of ballet slipper pink spray paint and it already looked distressed.
Which inspired my to attempt glazing on the other two frames (more of that story click
here)
And since I like this frame the best, I choose to put the print in it I like the best. But what should I back it with to make it pop?
I really like the Japanese papers from Paper-Source so I thought I would start there. and this classic cherry blossom print was very pretty...but I felt it was just a little too busy and not really the vibe I was going for. so I tried out this one...
Again cute...but just not right. The saying is "tough" so I needed a paper pattern to match it.
Now this was closer to what I was going for...but still not just right. I felt it was too busy...so maybe a solid would look better...
Now I liked this the best! But it just looks too flat...too one dimensional. So maybe if I blew the print up larger?
OK I like this, but still too plain (I am a very picky woman...haha)
Then I remembered I had some leftover paper from some invitations I had done that had a great print. So I grabbed the extras from my craft room...
I like that...but the print kind of gets lost because it it so light...
And this was good. But it was still lacking something...so maybe a combination of solids with a print...
And tada! Perfection! Now for the next frame. I started using this cheapo frame that was part of a grab bag of frames I got from Craigslist for $25.00 awhile back, but it just didn't fit with the other two...
See what I mean? The top one is too plain. so I remembered that I
recently acquired a few other frames from the thrift store (again purchased for my Dad and once again I kept them...sorry Dad). And these have a much better shape to them.
So a couple coats of spray paint later...
So here is the final product hung up in my kitchen!
Pretty cute huh??? It is a big improvement! This is much better to walk in to...
And the two framed prints look pretty good together...
So here is the final before and after shots...enjoy!


.jpg)
.jpg)
.jpg)
.jpg)
.jpg)
.jpg)
.jpg)
.jpg)
.jpg)
.jpg)
.jpg)
.jpg)
.jpg)
.jpg)
.jpg)


.jpg)
.jpg)
.jpg)
.jpg)


.jpg)
.jpg)
.jpg)
.jpg)
.jpg)
.jpg)

.jpg)
.jpg)
.jpg)
.jpg)
.jpg)
.jpg)
.jpg)
.jpg)
.jpg)
.jpg)
.jpg)
.jpg)
.jpg)
.jpg)
.jpg)
.jpg)
.jpg)
.jpg)
.jpg)
.jpg)
.jpg)
.jpg)
.jpg)


